Introduction
Mautic is a very popular email marketing and lead management software that can be used to create customized email templates and email campaigns. Here are the detailed steps you need to follow to install Mautic on your Linux server – Centos 7.
Prerequisites
- PHP 5.6.19 +
- MySQL 5.5.3 +
- Apache / Nginx
- An SMTP provider
Installation
Step 1: Enter into the root directory of your remote server
$ cd var/www/html/
Step 2: Create a new directory named Mautic
$ sudo mkdir mautic
$ cd mautic
Step 3: Download the Mautic production file package
To download Mautic at your local machine click here
Fill your credentials and click on the download button
The downloaded file would be named something like this 2.15.3.zip
Step 4: Copy the zip file to the remote server
Enter the following commands in your local machine download file location
$ scp -r 2.15.3.zip root@<your-domain-name/ip-address>:/var/www/html/mautic/mautic.zip
Note:- By any chance you don’t have access to copy files to your server directory you can use FTP to upload the zip file.
Step 5: Unzip the file contents
$ sudo unzip mautic.zip
If you don’t have unzip installed you can install it by using
$ sudo yum install unzip
Step 6: Delete the zip file
$ sudo rm -rf mautic.zip
Step 7: Install php and dependencies
$ sudo yum -y install php php-mbstring php-xml php-mysql php-common php-gd php-json php-cli php-curl php-zip php-xml php-mcrypt php-imap php-intl php-process
After installing PHP, run the commands below to open PHP default config file for Apache
$ sudo vim /etc/php.ini
Then make the changes on the following lines below in the file and save. The value below are great settings to apply in your environments.
file_uploads = On
allow_url_fopen = On
short_open_tag = On
memory_limit = 256M
upload_max_filesize = 100M
max_execution_time = 360
date.timezone = America/Chicago
After making the change above, save the file and close out.
Step 8: Setting up MySQL
- Download the rpm file
$ wget https://dev.mysql.com/get/mysql57-community-release-el7-9.noarch.rpm
- Set the installation package
$ sudo rpm -ivh mysql57-community-release-el7-9.noarch.rpm
- Install MySQL server
$ sudo yum install mysql-server
- Start MySQL
$ sudo systemctl start mysqld
- Set MySQL root password
– After the installation a temporary password will be generated in the mysqld.log file you can access this password by the following command
$ sudo grep ‘temporary password’ /var/log/mysqld.log
– Now you will get a message something like this
[Note] A temporary password is generated for root@localhost: ,b*-rkuIR4Zas
– Copy this password for the next step
– Enter this command
$ sudo mysql_secure_installation
– This will prompt you to enter the root password you can enter the copied password you’ve got in the previous step
– After entering the password you will be prompted to enter a new MySQL password.
– Enter a new 12 character password with uppercase lowercase letters, numerical and a special character
– You will now be prompted with multiple questions on how to set up the MySQL installation. You can say yes to all except if asked to change the password again.
- Login to MySQL with your newly set password.
- Create Mautic database and add User
mysql > create database mautic;
mysql > CREATE USER ‘mauticuser’@’localhost’ IDENTIFIED BY ‘password’;
mysql > GRANT ALL PRIVILEGES ON * . * TO ‘mauticuser’@’localhost’;
mysql > FLUSH PRIVILEGES;
mysql > exit;
Step 9: Setting up Http Server
(You can install Nginx or Apache server according to your needs)
– Apache:
- For installing Apache you can follow these steps
$ sudo yum install httpd
$ sudo systemctl start httpd
$ sudo systemctl enable httpd
- You need to make the following changes to httpd.conf file
$ vim /etc/httpd/conf/httpd.conf
<VirtualHost *:80>
DocumentRoot /var/www/html/mautic
ServerName example.com
<Directory />
Options FollowSymLinks
AllowOverride All
</Directory>
<Directory /var/www/html/mautic>
Options FollowSymLinks MultiViews
AllowOverride All
Order allow,deny
Allow from All
</Directory>
</VirtualHost>
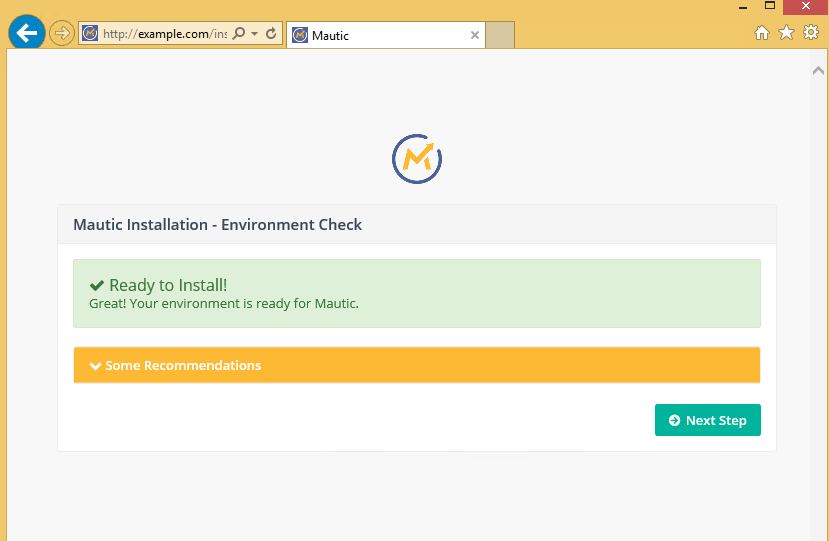
After this you will be opening http://<your-domain-address>/ to open Mautic installation panel
Step 10: Setting folder permissions
You may get this error if some folder permissions are not set
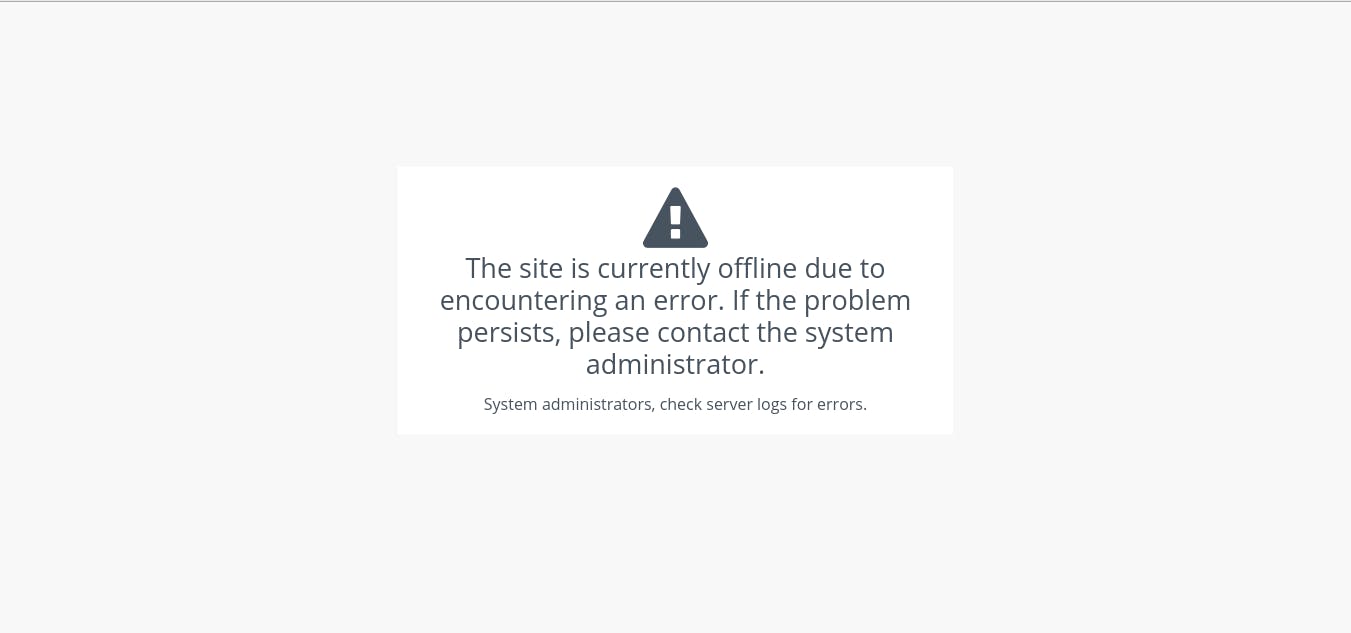
This error might exist because your Mautic folder user group is not the same as your running php instance.
Depending upon your user group you can set the following permissions.
Run the following commands to set permissions for Mautic installation
If it is apache you have to set permissions like this
$ sudo chown -R apache:apache /var/www/html/mautic/
In this file check the user option
Set the Mautic directory permission
$ sudo chmod -R 755 /var/www/html/mautic/
Now you can go back to the browser and refresh the window and call the ip or domain name.
Then follow the on-screen instructions… you will be asked to input your database configuration, administrative details and other configuration settings. When complete you may sign-in and start using Mautic….