Architecture Diagram:
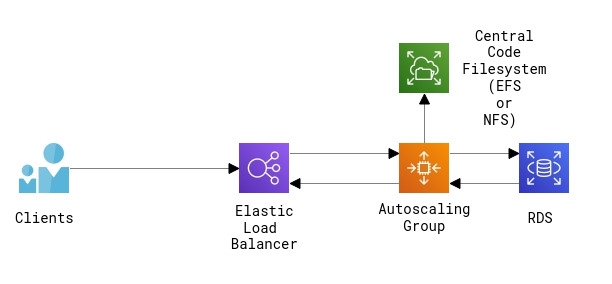
AWS Autoscaling will be the solution for our highly available and scalable WordPress site. AWS Autoscaling will take care of always having a minimum quantity of instances available for the public, and in case something goes wrong, it will replace the instance with a healthy one. This way our site will always be available. Autoscaling will also benefit our WordPress by creating instances based on the traffic demand and will help us to save costs while the traffic is low.
Here we first create a NFS for centralising our code:
For that we need a separate instance. I am using a basic t2.micro free tier instance with 8GB disk space.
SSH into this instance.
Update packages with yum:
#yum update
#Install nfs-utils,
#yum install nfs-utils
Make a directory for sharing:
#mkdir /vishnulal-tech
Change ownership of the directory appropriately:
#chown -R nfsnobody:nfsnobody /vishnulal-tech/
We need to enable and start necessary services for the proper working of NFS:
#systemctl enable rpcbind
#systemctl enable nfs-server
#systemctl enable nfs-lock
#systemctl enable nfs-idmap
#systemctl start rpcbind
#systemctl start nfs-server
#systemctl start nfs-lock
#systemctl start nfs-idmap
On next step we need to edit the /etc/exports file for sharing directory over the network:
#vi /etc/exports
Add the below line to the file:
/vishnulal-tech 172.31.16.0/20(rw,sync,no_root_squash,no_all_squash)

I have shared the directory across the entire subnet CIDR. You can specify individual values if you want.
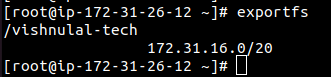
Just restart the NFS service and share the directory using exportfs command:
#systemctl restart nfs-server
#exportfs
Now let’s launch an EC2 instance for configuring our web server. (Here I am using Ubuntu 20.04 free tier eligible ami with t2.micro instance type, Open port 80 in the security group.)
Connect to your instance using ssh.
Update your ubuntu installation:
#apt update && apt upgrade
Install apache2:
#apt -y install apache2
Install php:
Install software-properties-common package:
#apt -y install software-properties-common
Add PHP repository:
#add-apt-repository ppa:ondrej/php
Now install PHP 7.4 and necessary extensions:
#apt -y install php7.4 php7.4-mysql
Install mariadb/mysql server:
Add Mariadb Repository Key to the system:
#apt-key adv –fetch-keys ‘https://mariadb.org/mariadb_release_signing_key.asc’
Now add Mariadb APT repository:
#add-apt-repository ‘deb [arch=amd64] http://mariadb.mirror.globo.tech/repo/10.5/ubuntu focal main’
Install mariadb server and client:
#apt install mariadb-server mariadb-client
Harden Mariadb server:
#mysql_secure_installation
Enter into mysql server console:
mysql -u root -p
Create new database:
CREATE DATABASE sfc_scale;
Grant privileges to a user on the database:
GRANT ALL PRIVILEGES ON sfc_scale.* TO ‘sfc_scale’@’localhost’ IDENTIFIED BY ‘pa$$word’;
Now host the wordpress website on the server. (Here I’m using scale.spotfixcrew.com)
Apache Virtualhost file is given below:
<VirtualHost *:80>
ServerName scale.spotfixcrew.com
DocumentRoot /var/www/vishnulal-tech
<Directory /var/www/vishnulal-tech>
Options Indexes FollowSymLinks
AllowOverride All
Require all granted
</Directory>
</VirtualHost>
We need to mount the NFS we created in the first instance to our document root.
First install nfs-common on our server:
#apt install nfs-common
mkdir -p /var/www/vishnulal-tech
Next, we need to mount the NFS shared directory,
vi /etc/fstab
172.31.26.12:/vishnulal-tech/ /var/www/vishnulal-tech nfs defaults 0 0

Move our wordpress website files into the above directory and restart apache service.
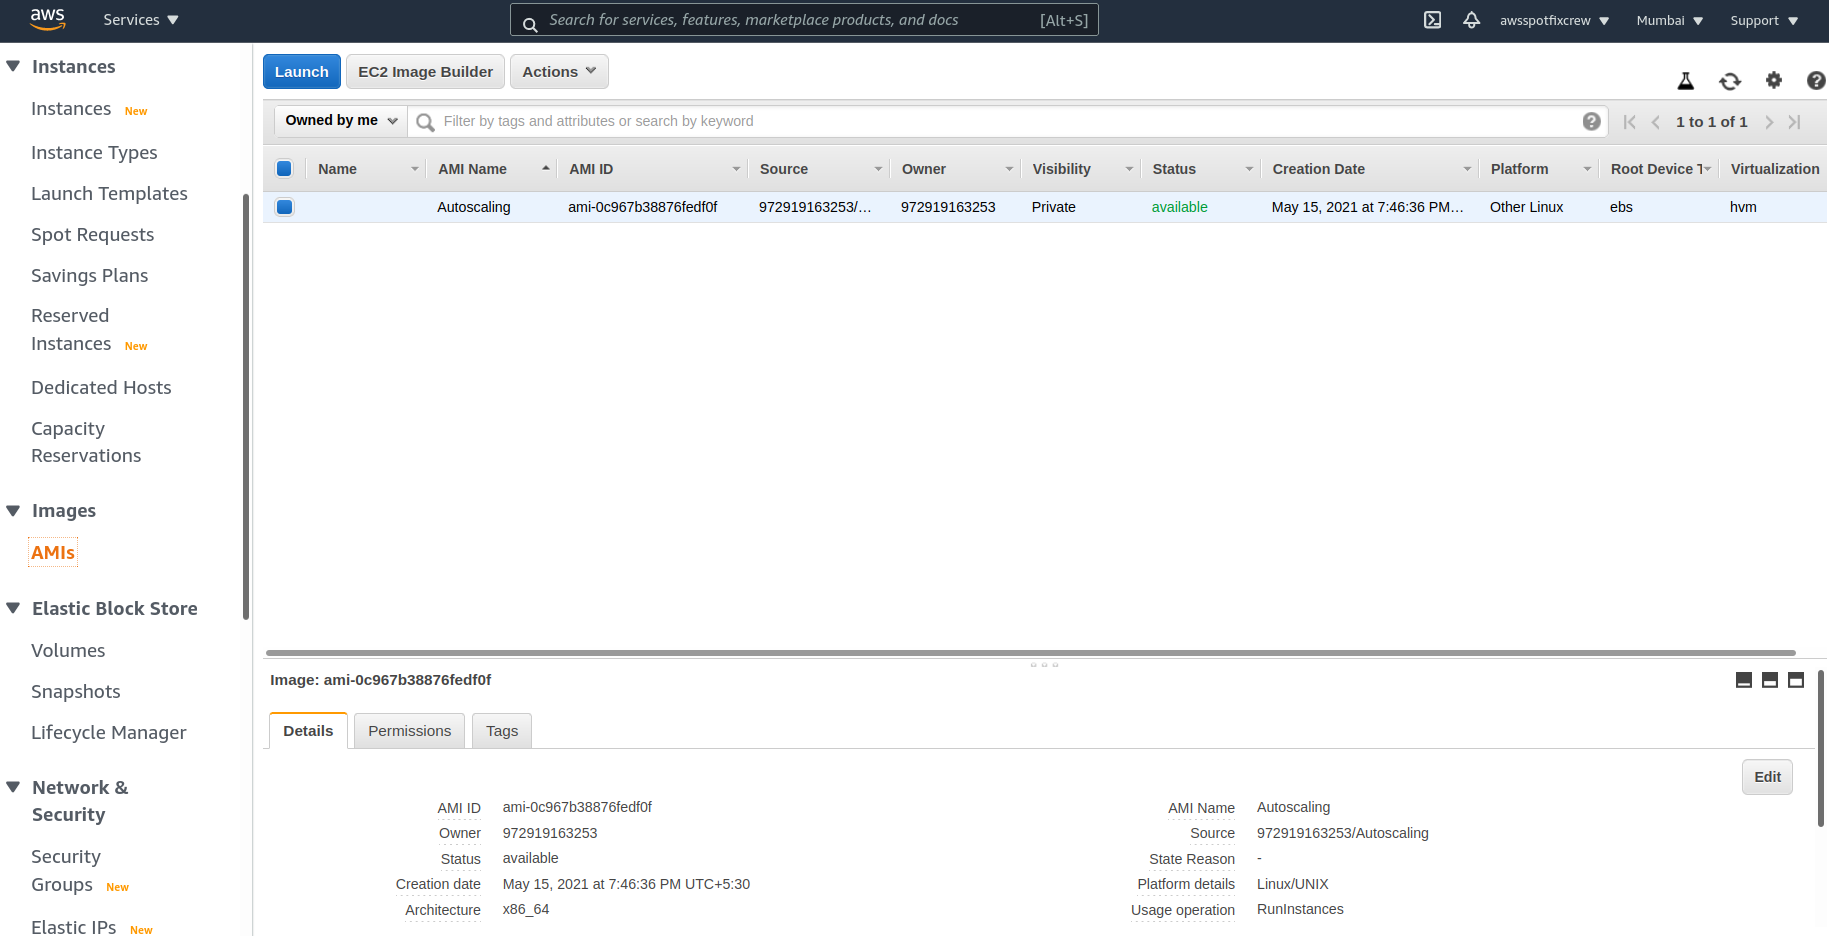
Now stop the ec2 instance and create an ami from the instance.
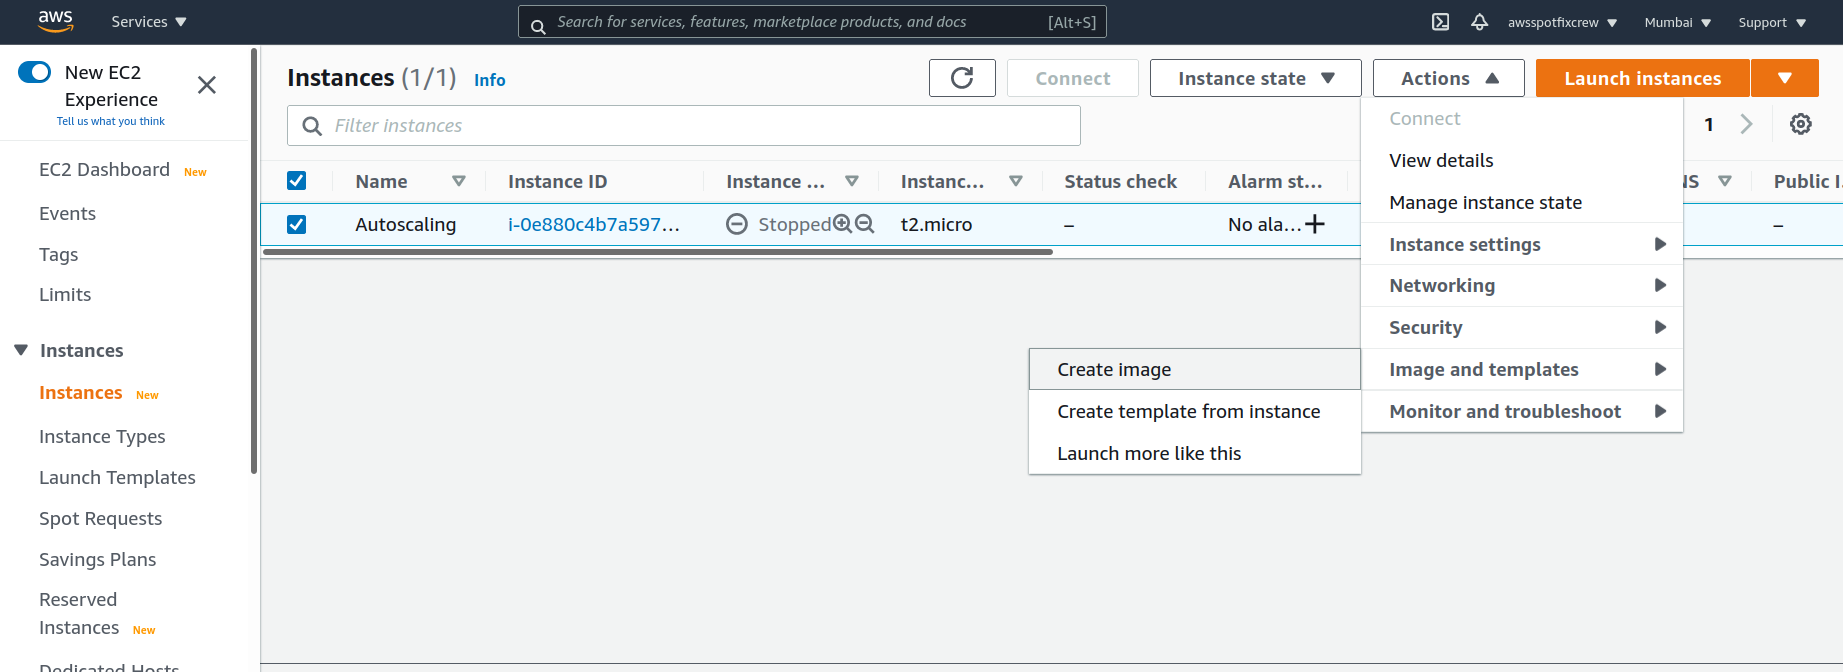
Give a name for the AMI:
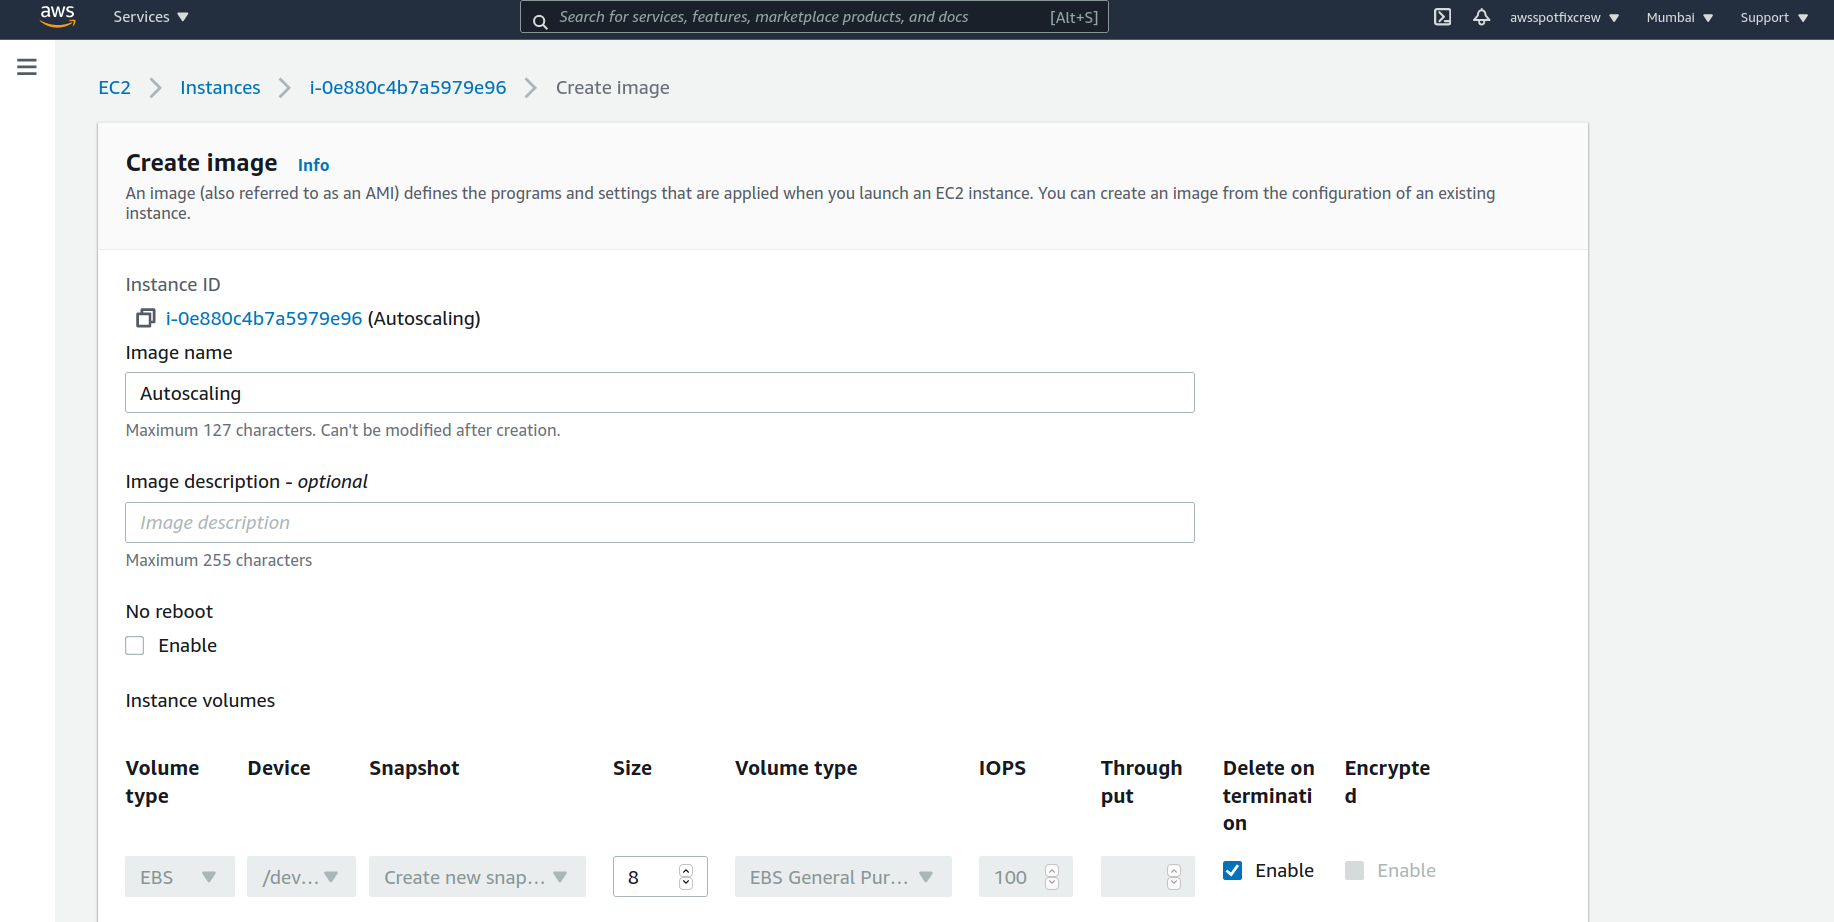
Then click on ‘Create Image’ to create the image.
We can see the created AMI in the ‘AMIs’ section.
We can setup auto scaling group now:
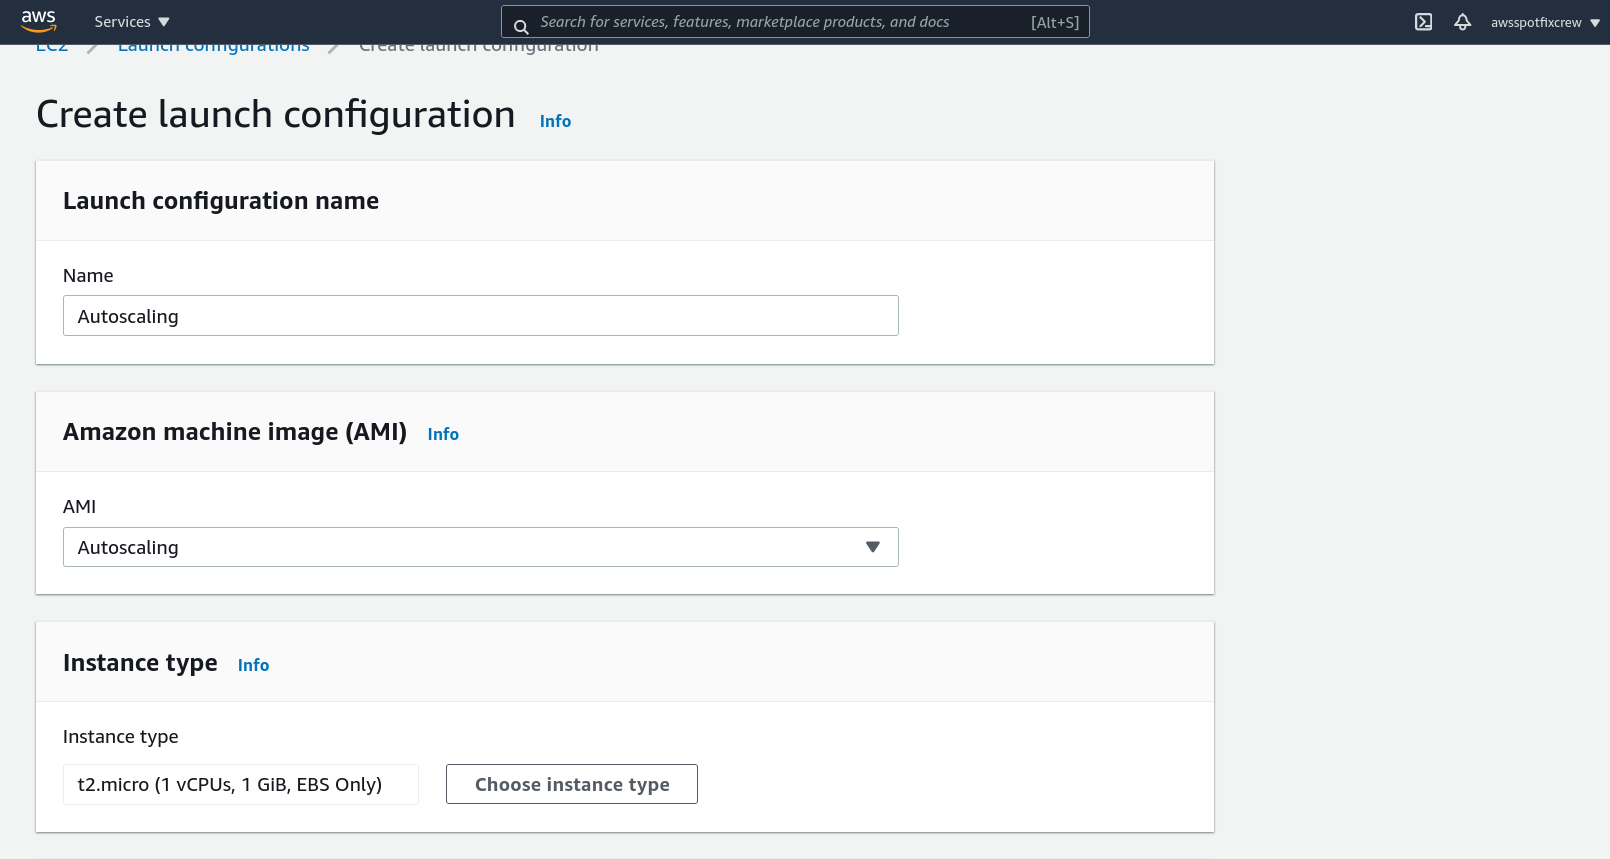
First Create a Launch Configuration:
Give a name for the Launch Configuration, Choose AMI and Choose instance type.
Now go to auto scaling groups, Click on ‘Create Auto Scaling group’
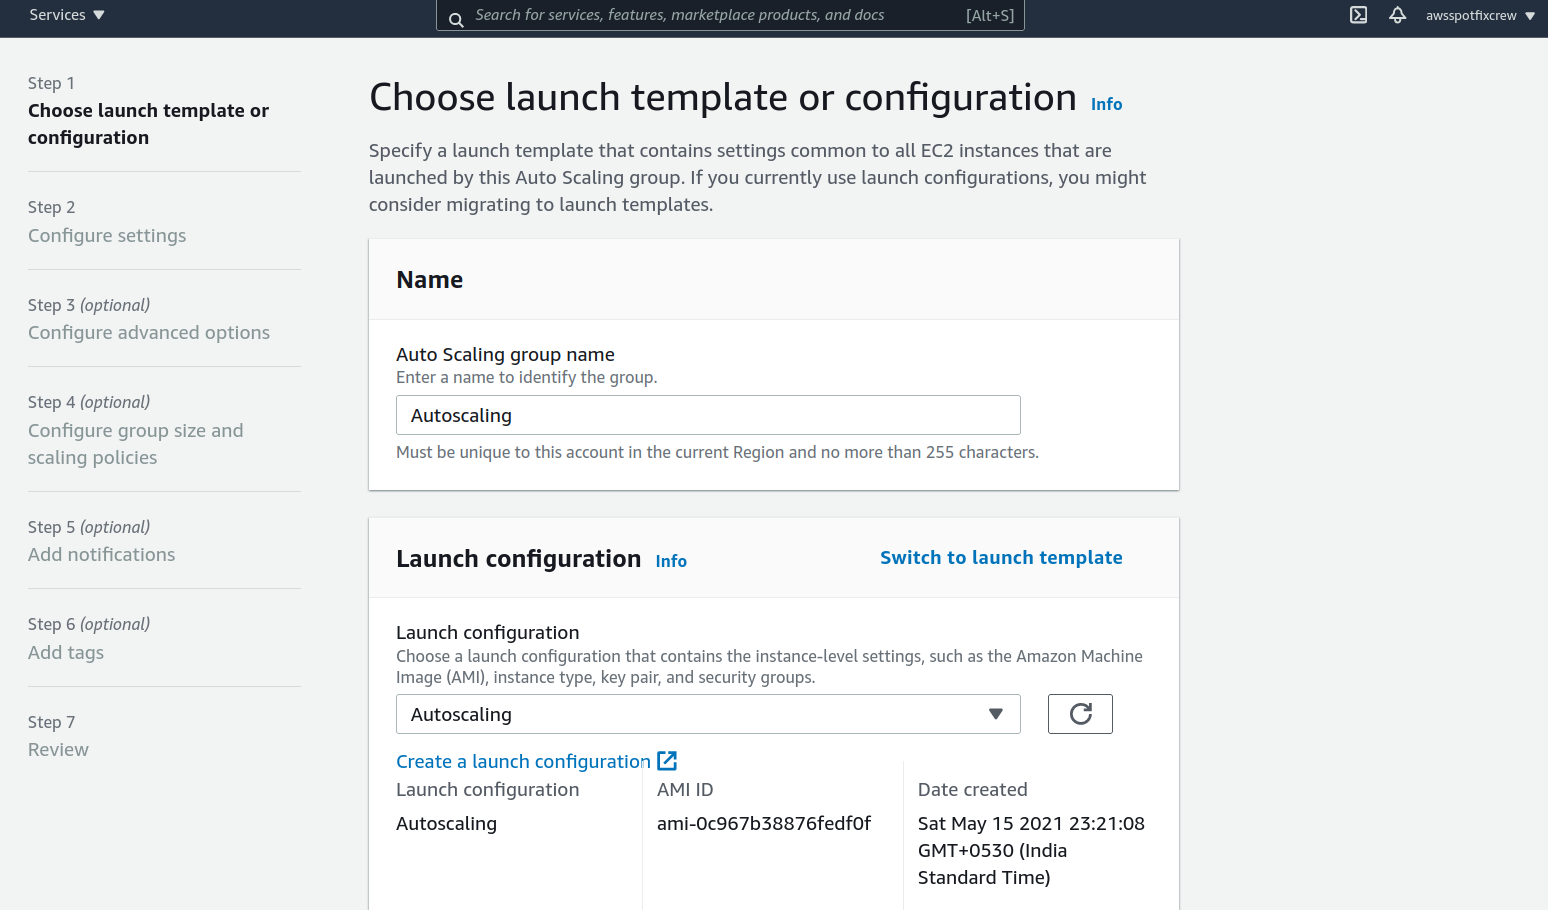
Provide a name for the autoscaling group, Choose the launch configuration we created.
On next page:

Select VPC, Subnets for placing auto scaling ec2 instances. (Here I selected default VPC and subnets).