WHM (Web Host Manager) is a control dashboard that gives the user the ability to manage multiple cPanel-based sites. cPanel is a web hosting control panel software with graphical Interface and automation tools which help us to simplify the process of hosting a web site.
Basically we can say WHM is the mother of cPanel.

WHM Dashboard look like this and there is an option for search services.

Create New cPanel Account
Click on ‘Account Functions’ and Create a New Account or simply search ‘Create a New Account’ on search tab. The give appropriate details.


After that click Create.Now your cPanel Account has been created successfully.
Delete a cPanel Account
First type ‘List accounts’ in searching tab and select it.

Then it will show a list of cPanel accounts. Click the ‘+’ symbol and it will show a list of options.

We need to click ‘Terminate Account’ and it will ask for confirm. Click the ‘Yes, remove this account’ button to proceed with deletion.
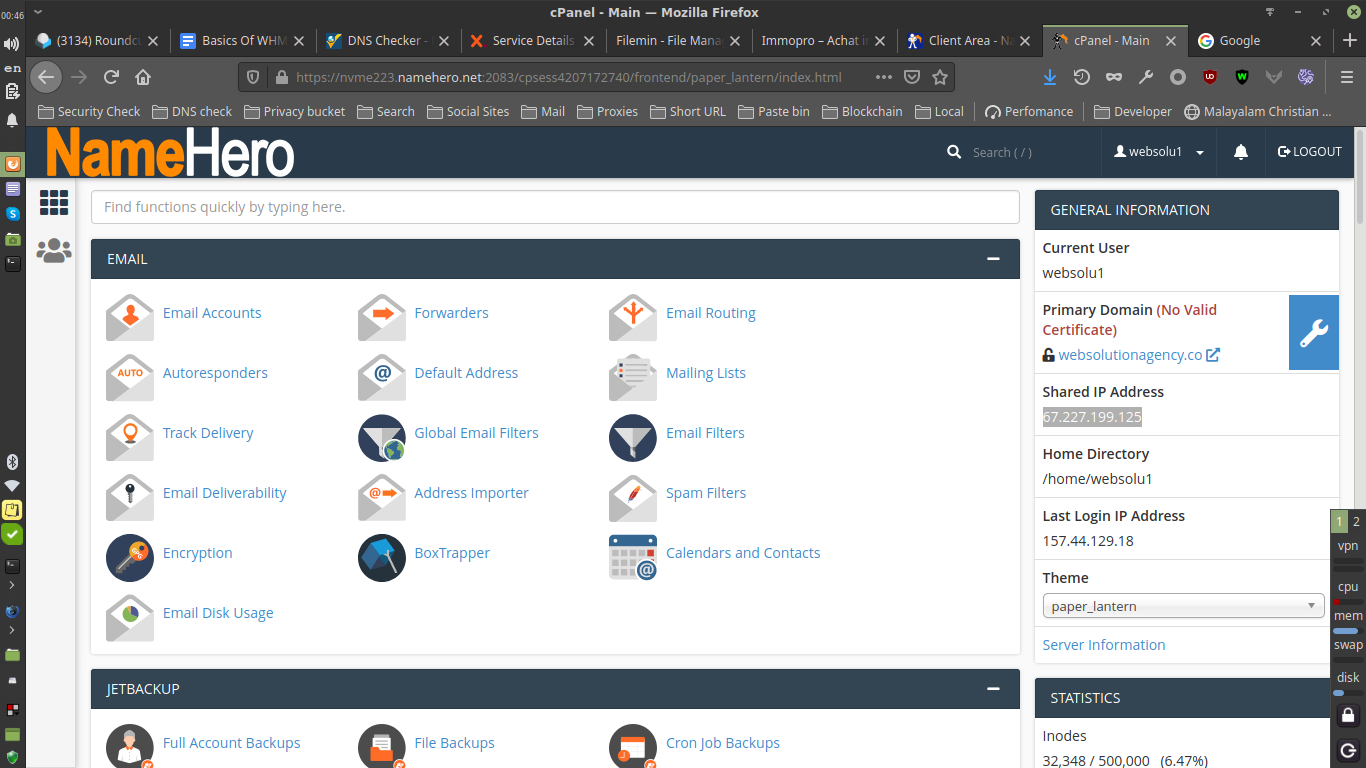
cPanel Dashboard
cPanel allows you to publish websites, manage domains, organize web files, create email accounts, and more.Cpanel dashboard look like this.

Main tools of cPanel are,
1. FILES
2. DATABASES
3. DOMAINS
4. EMAIL
5. SECURITY
6. SOFTWARE, etc..
1. FILES

We can manage our files by ‘File Manager’ section. Inside that a folder named ‘public_html’, by default it contains our web files.

Also we can create FTP accounts through this section. Just click on ‘FTP Accounts’ and give appropriate details shown below.

2. DATABASES

We can create new Database, User and also can grant privileges through ‘MySQL Databases’ section.

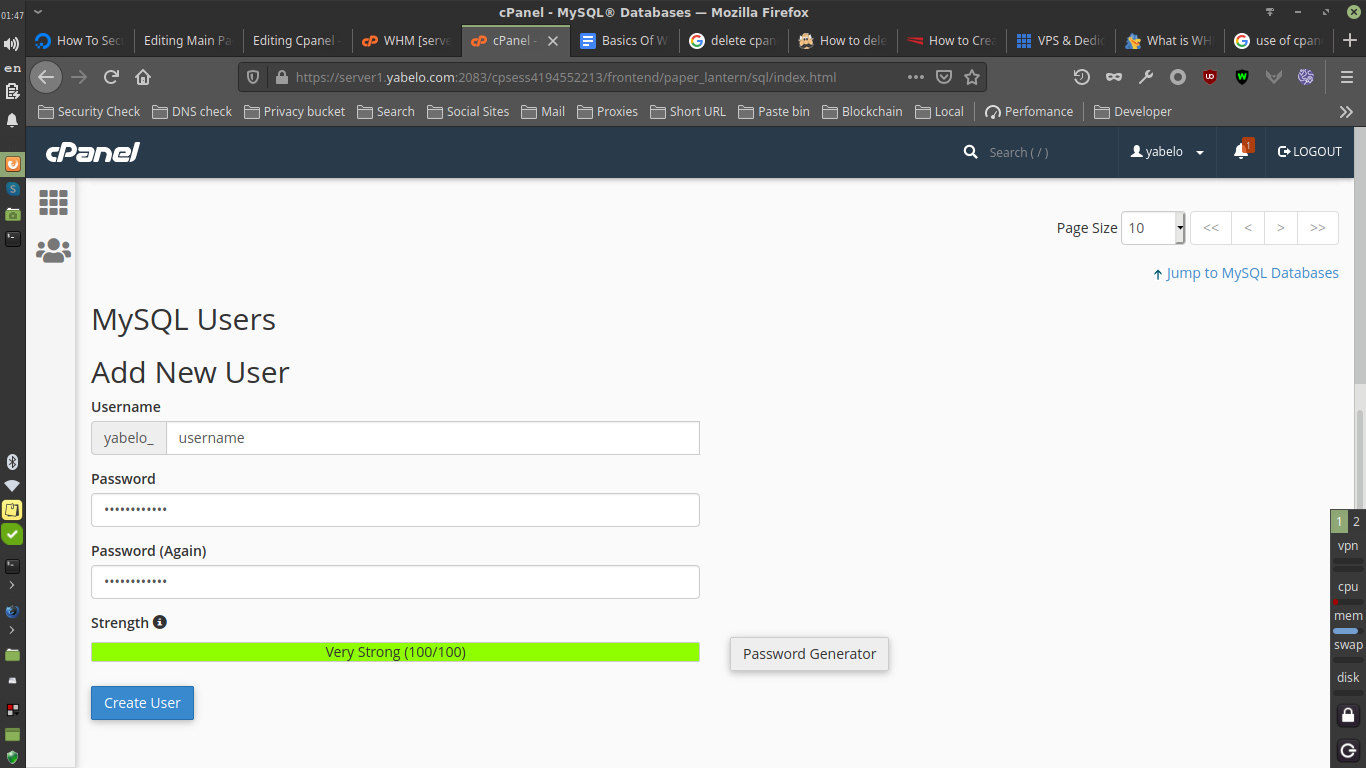
Add Database User To Database as follows. After select user and database, click Add.

3. DOMAINS

We can add sub-domains through ‘Subdomain’ section and and add new domains through ‘Addon Domains’ section.Also if we wand to add redirection rules it will be done through ‘Redirects’ section.
4. EMAIL
We can create new Email accounts through ‘Email Accounts’ section.
Main Log files Location on cPanel Server
Apache access log : /usr/local/apache/logs/access_log
Apache error log : /usr/local/apache/logs/error_log
Domain logs : /usr/local/apache/domlogs
Exim log : /var/log/exim_mainlog
cPanel access log : /usr/local/cpanel/logs/access_log
cPanel access log : /usr/local/cpanel/logs/error_log
FTP log : /var/log/messages
SSH log : /var/log/secure or /var/log/messages
EasyApache
EasyApache 4 (EA4) installs, configures, updates, and validates your web server, PHP, and the other components of your web server. It provides an easy and convenient way to modify your web server
It will be available on ‘Home »Software »EasyApache 4’.
For customizing or adding Apache modules and php extensions, click on ‘Customize’ .

Then Click on Next and enable appropriate modules and extensions. At last click on Provision
To effect the changes.
Restart Services
We can restart services on cpanel by going to Home » Restart Services

For example we can restart HTTP Server by just clicking ‘yes’.

MultiPHP Manager
The MultiPHP Manager interface allows you to easily manage the PHP and PHP-FPM configurations of your cPanel accounts and domains and is available for systems running EasyApache 4
We can select it by going to Home » Software » MultiPHP Manager.
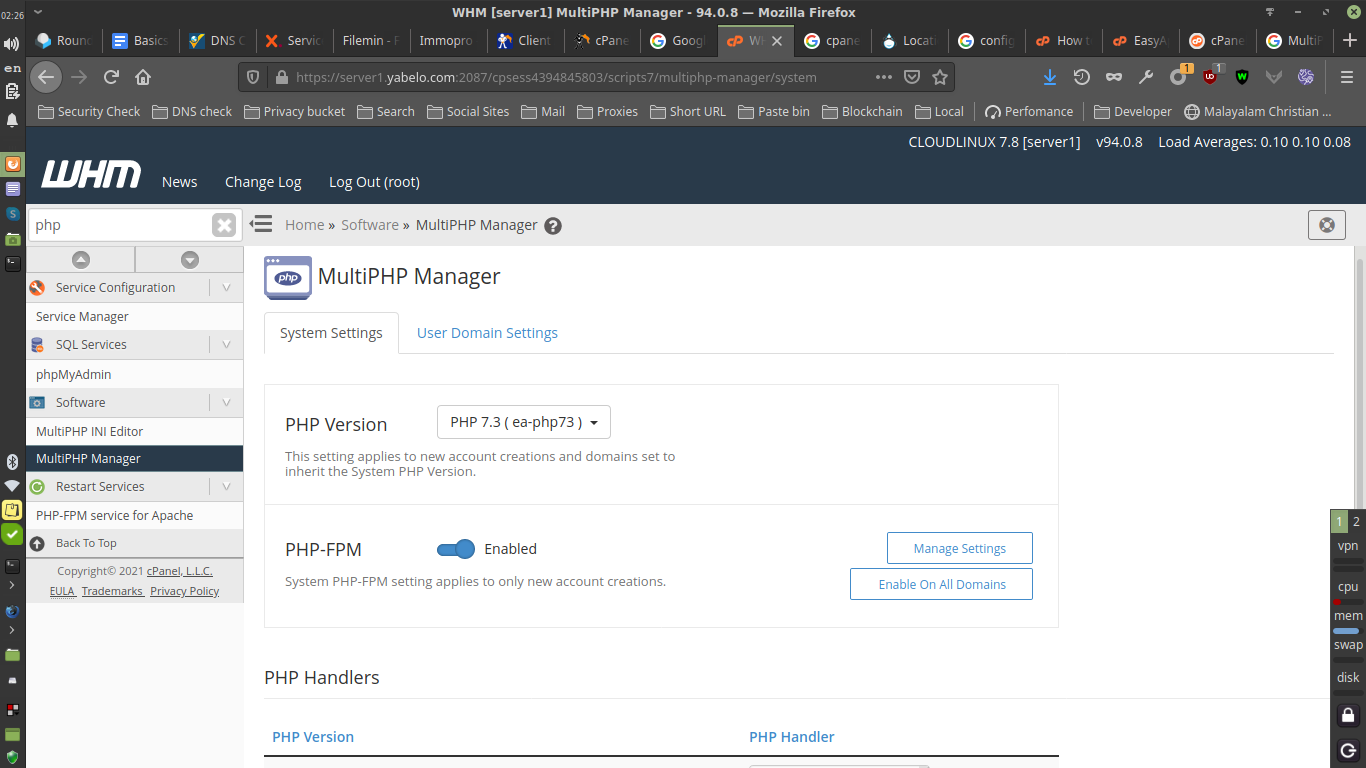
PHP-FPM can be configured by clicking on ‘Manage settings’. Then we can configure settings like ‘Max Requests Expand’, ‘Max Children’, ‘Process Idle Timeout’. After changing these parameters click ‘update’.
